Ew PHP, right? High-fives all around. Except that for my generation, the first cool web app you’d create would be written in PHP, often coupled with MySQL. Not only it is a language you can use object-oriented principles if used well but also it is free to use. There is a reason that massive platforms such as Shopify, Facebook or even WordPress still use PHP to this day. Today, I will show you how to set up your WordPress development environment in about 10 minutes with the power of Docker.
Before we start you will need
- Docker Desktop, available on Windows 10 (even Home), OS X. Not sure about the option for Linux but you can definitely set up docker and docker-compose. It will come with the tools we will use here:
- Docker, because we will be using containers
- Docker-compose will make it easier to orchestrate our WordPress and DB container without too much overhead.
I am using VSCode but feel free to use any IDE or text editor you feel comfortable with.
Create your root development folder
In my case, I created a wordpress-dev folder which is will be my workspace where all the plugins and themes will go. Assume that from now on, I will refer to files and actions to execute will be relative to the wordpress-dev path.
The first file we will create is a docker-compose file. This file will contain the base information to spin up our docker and MySQL containers for use. I copied it from the WordPress docker page and made a minor change for now. I fixed the WordPress version to make sure that this tutorial will still work regardless of when you go through it.
Save the file as docker-compose.yml and execute the following command:
docker-compose up
After a few seconds, maybe minutes depending on your setup, you should see this:

Checking your default setup is good
Your WordPress instance would be working and accessible at http://localhost:8080. From there, you should see the setup screen as below:

. Once you selected the language you just need to fill details from that screen:

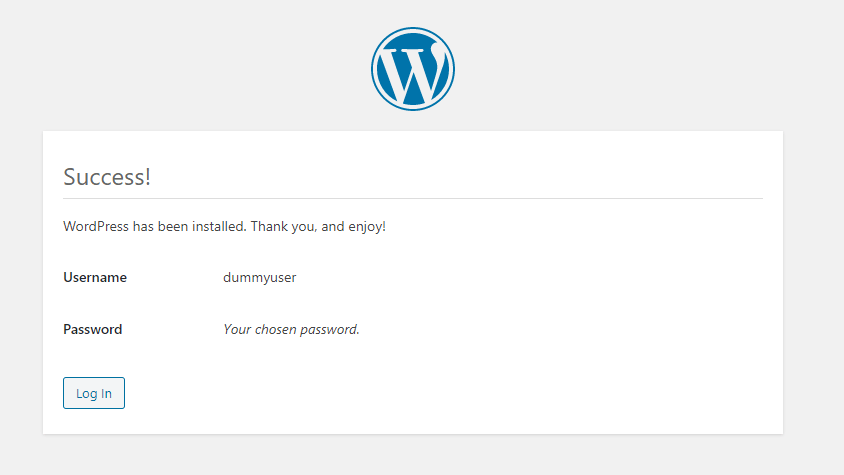
I suggest you don’t use real credentials for this step in case you decide to check your workspace using source control. Personally, I store the dev credentials in a text file in the folder so I don’t need to ever bother about these. Plus if someone actually gets hold of my machine all they have is a local setup password unused anywhere else. After filling the fields and pressing “Install WordPress” you land on the installation confirmation page.

Completing your WordPress development workspace
Now you’re all set with a local installation of WordPress that is ripe for local experimentation, you need an easy way to plug the useful stuff. You know, the plugin and themes folders you’re here for.
First, go to your workspace folder and create the themes and plugins sub-folders. Now we will add volumes for the WordPress container to map the workspace plugins and themes to the WordPress installation. This is how the docker-compose file will look like:
Once you updated the docker-compose file, use the kill shortcut, Ctrl-C or Cmd-C depending on your platform.
Now there is a gotcha. Since your theme folder is empty, if you try to bring the containers back up you will have an error message about the twentytwenty folder gone missing. In order to avoid that, you will need to install the TwentTwenty theme manually. To do so, download it here and extract it. You should have a twentytwenty folder with the theme files inside. Copy that folder to your workspace themes folder.
Finally, bring back up your containers with the compose up command.
docker-compose up
Now if you go back to http://localhost:8080 you should see your install is still there.

Validating your WordPress development setup with a dummy plugin
Now that environment is set, time to create a plugin through it. First, create a dummy-plugin folder in your plugins folder. The path from your workspace root should be plugins/dummy-plugin. In that folder, copy this file:
Now save it as dummy-plugin.php and go to your admin. Note that you may need to re-authenticate. However, you shouldn’t need to restart your containers for this one. Once signed in, go to the “Plugins > Installed Plugins” section:

You should see your Dummy Plugin in the installed plugins list.

Congratulations! You now have a working development setup to create and contribute to open-source WordPress plugins. For the open-source plugins, you may clone them directly in your workspace plugin repository as long as the root folder matches the released plugin in shape. As you can see on the screenshot above, the Podlove plugin I cloned in my workspace plugins folder is there too. One thing to be careful about though, if you delete the plugin in WordPress, it will delete the folder so make sure it is actually what you want.
I hope you enjoyed that tutorial, and feel free to share it with your friends, colleagues, family and pets. Don’t hesitate to follow me on Twitter @CodingNagger and to subscribe to the podcast to get mostly tech content.
Cover by Christina Morillo from Pexels
